

Hi!
Sorry for being late. My sewing mojo is definitely taking a break, so I am pretty slow at my sewing machine.
I guess the really busy times and stress at school has taken me over. I am now feeling the pressure of being the 2nd year student…Yikes.

Anyway, today I am sharing with you the instruction for making the second block of the About A Quilt Sampler Quilt Along. This block is commonly known as the card trick block.

You will need 4 pieces of fabrics for the cards and 1 background fabric
From each of the card fabrics, cut 1 piece of 5 ¼” Square and 1 piece of 4 7/8” Square
From the background fabric, cut 1 piece of 5 ¼” Square and 2 pieces of 4 7/8” Square

From the 5¼” Square pieces, cut them into 4 piece of triangles by slashing through diagonally while from the 4 7/8” Square squares, cut in half diagonally so that you will have 2 pieces of triangle of each fabrics.

For the large triangles, match one of each piece of printed triangle to solid background ones and sew along the diagonal edge.
For the smaller triangles, do the same but this time sew on one of thesides of the triangles, making sure that the printed one would be on the right side.

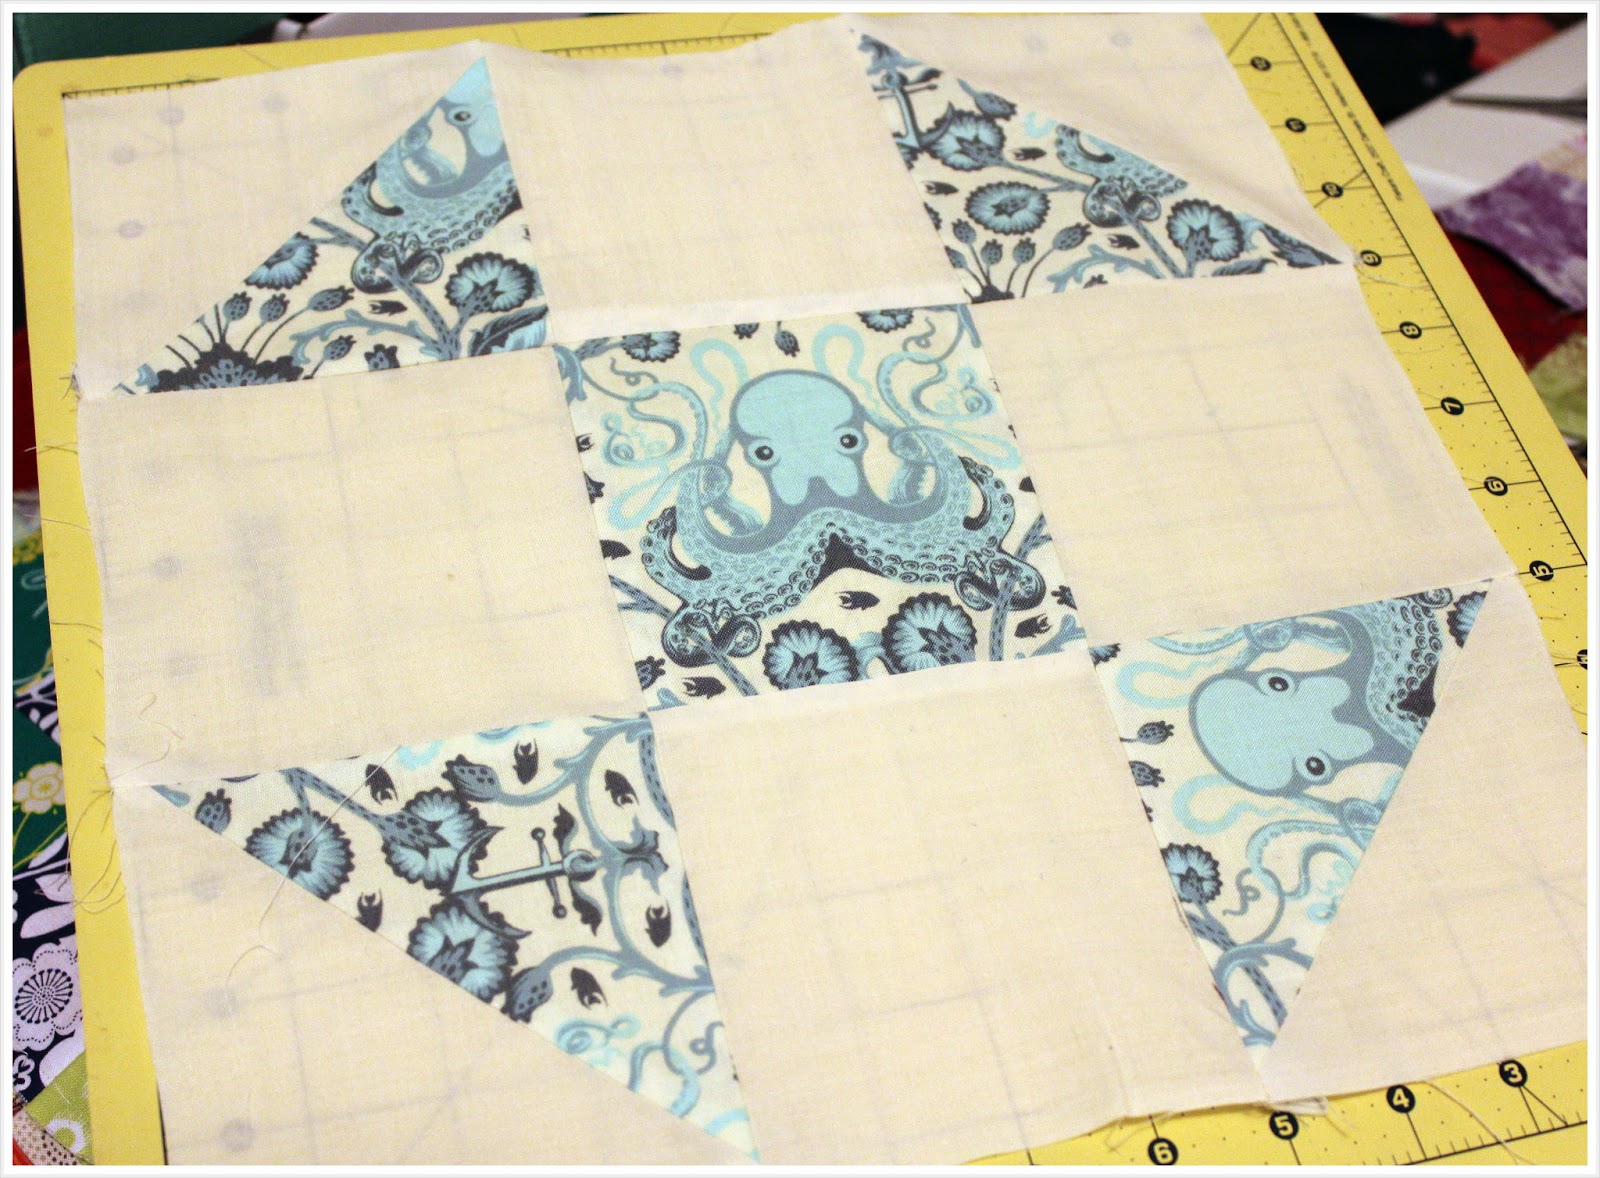
Position the sewn pieces as below

Now place the leftovers of the large triangles into place as below

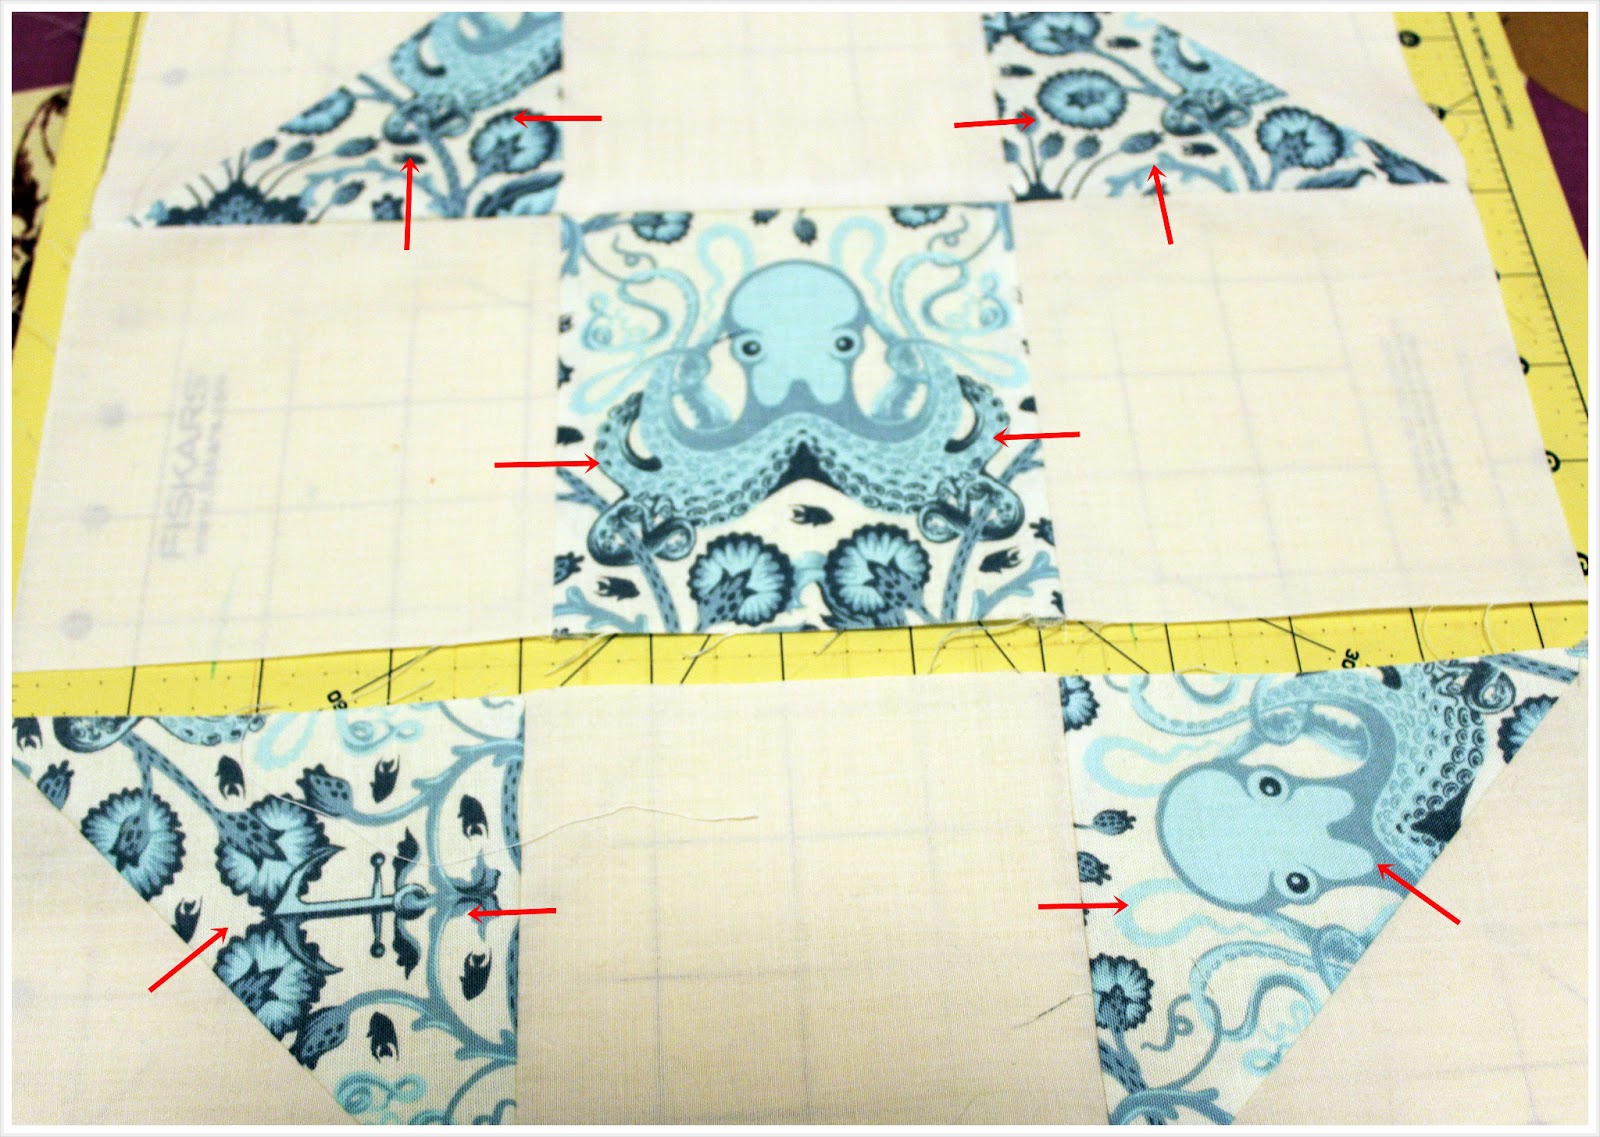
Place 4 pieces of the small triangles in the middle part and take note where the seams are to be sewn.

At this stage I normally put the pieces to be sewn right sides together and carefully place them so that I will know which sides to sew.

Once all the pieces are sewn into 4 ½” square, sew them row by row. Trim to 12.5” block. And voila! You are done with the 2ndblock!

We will be quilting it soon!That post will be up this weekend.
XOXO


 The informal QAL :
  Foundation Pieced Star Quilt @don’t Call Me Betsy
 Paper Piecing of sewing things by Kristy @ Quiet Play


 Something New Sampler


