fbpx
Category

Tips, Tutorials & Freebies

Category
Hi!
Today I am going to share you how I quilted my block 5 for our About A Quilt Sampler QAL. If you want to join in and new here, you can find more on this QAL by clicking here.
Before we go onto my quilting, I would like to just share you a few tips I learn as I go through this free motion quilting adventures;

1) Don’t be afraid of making lines that are not so perfectly straight, and don’t worry about it too much – just move on. (as we are still learning,  it has to start somewhere right, so don’t be too hard on yourself)

2) Make use of simple stippling or any simple technique that you are used to in a different way ( I am going to show you one way today)

3) Enjoy free motion, and don’t stress out. Find your liking and try and venture out from there. I personally like to try a lot of different designs, and I mostly change without a real plan, I love thinking as I go and just go for it!

So this week, why don’t you challenge yourself using just a simple technique such as stippling or scribbling and enhance out some features which you can draw first prior to quilting.
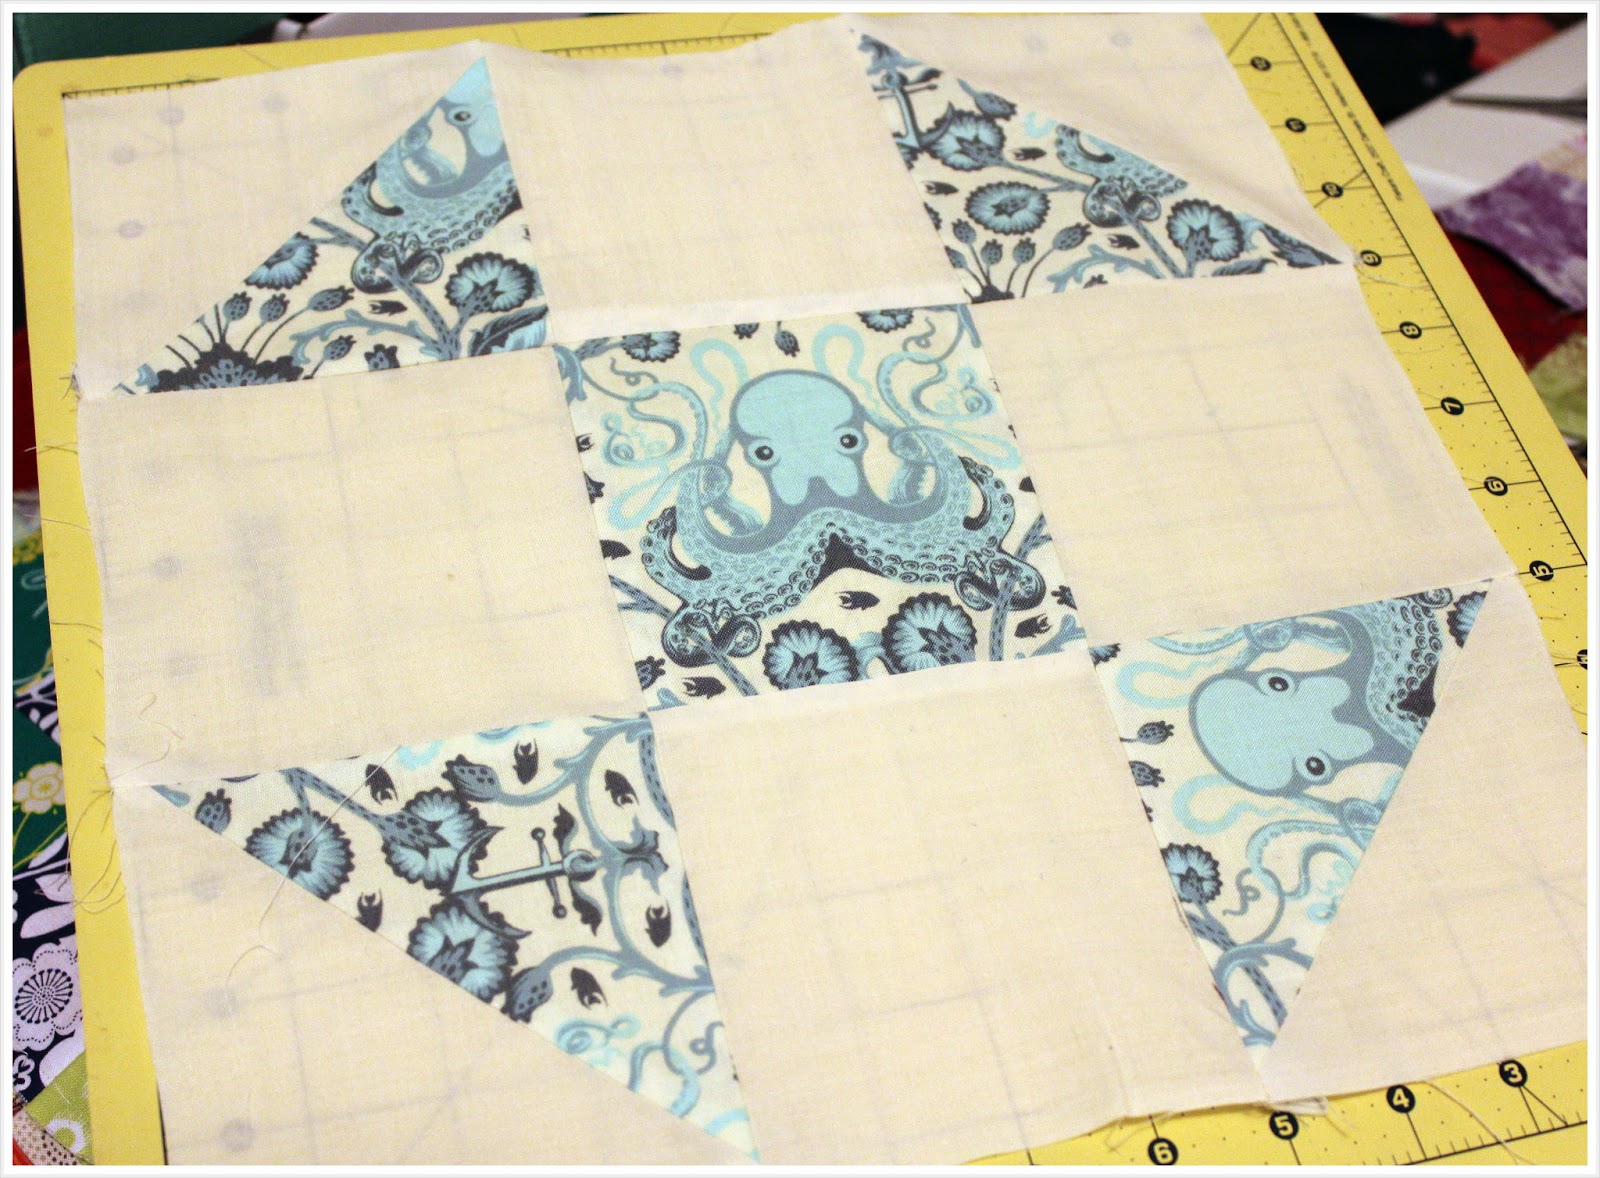
I drew out shells, seahorse, ropes and a starfish. I picked this out just from the fabric I used. You can also do that, pick something from the fabric and try to implement it in your quilting.
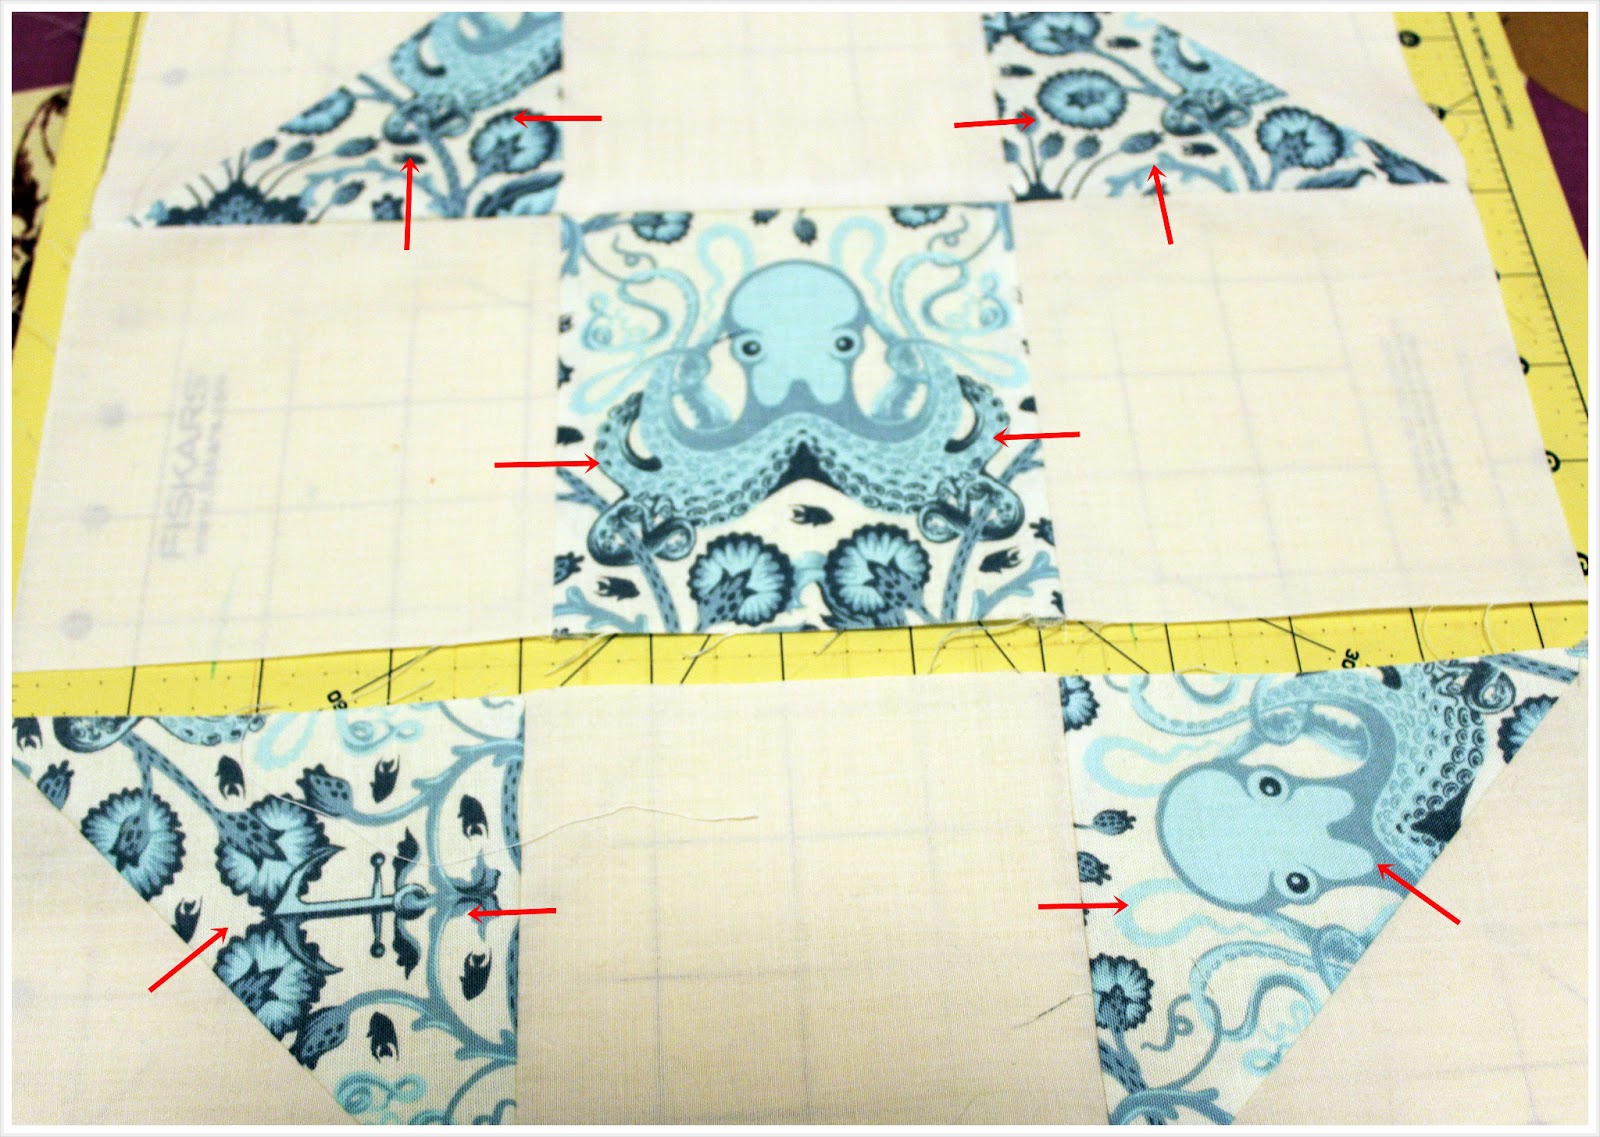
After you draw the features with erasable pen, you can start by free motion the outline of the drawings and start stippling or scribbling around it, creating a dense quilting and this shall pop the features.
However, in stippling case, you have to make sure that the stipple are small and packed in order to ensure that the features really pop out.

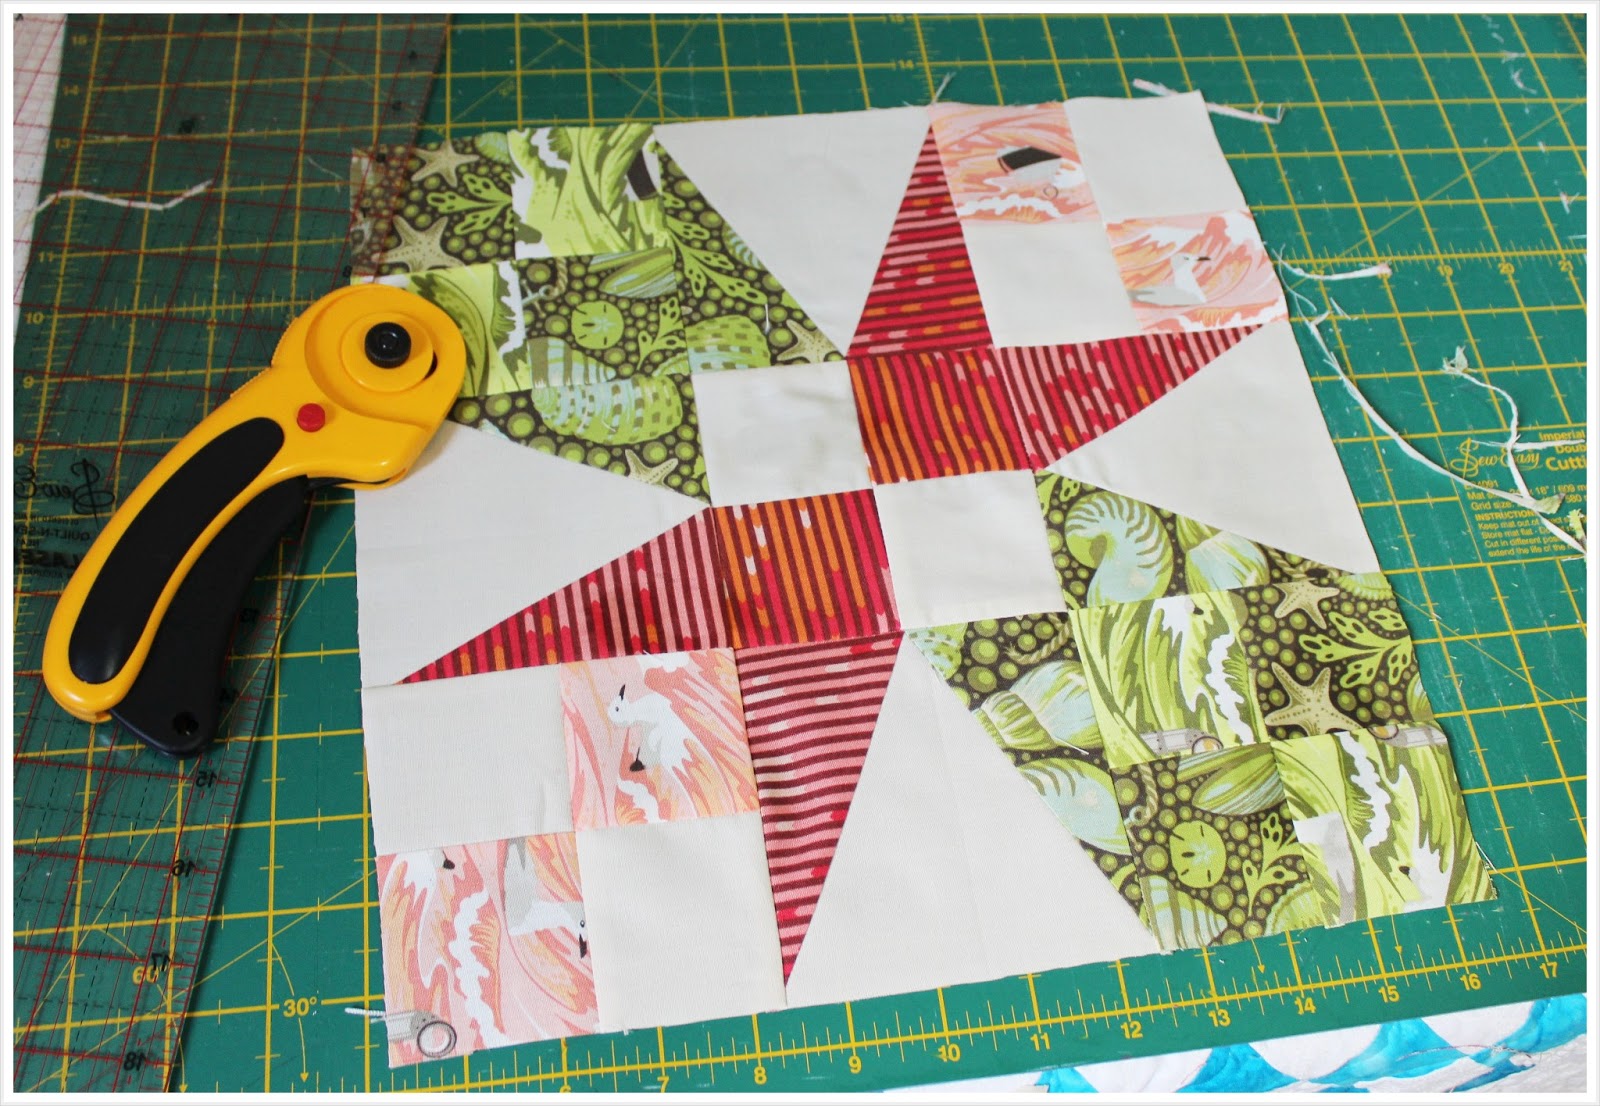
I used scribble for the pinwheel and stipple for the outer triangles. Scribble is more dense and more forgiving as you can just cross lines and does not really have a rule!
Once you are done with the block, trim it close to the block size. In this case, 12.5″ block.
I hope you to see yours if you make one! Share it here in flickr!
Till then,
XOXO
 
Hi!
 
 
Welcome back to About A Quilt Sampler QAL. If this is your first time here, you can read more on this QAL by clicking here.
 
 
If you miss previous post you can always go back to all the post by clicking the button on my blog sidebar or below:
 
YourSiteTitle
 
We are already on our fifth block with this QAL. The fifth block of this QAL is the half square triangle star
.
 
First, you can choose 3 print fabrics and one solid background or you can just use one print only. I love a scrappier look, so I use various blue prints.


Press towards darker side of fabrics or press open
 
Arrange your half square triangle blocks to match the block layout and sew them row by row taking notes where to press the seam to allow it to nestle well.
 
 
Well, I hope to see you again when we get to quilt this block! Thanks for following me along! You can add your version to littlemushroomcap flickr group!
 
XOXO
 
Hi!
Welcome back to About A Quilt Sampler QAL. If this is your first time here, you can read more on this QAL by clicking here.
If you miss previous post you can always go back to all the post by clicking the button on my blog sidebar or below:
YourSiteTitle
We are already on our fourth block with this QAL. The fourth block of this QAL is the leaf block.

You can find how to piece this block here.

In this post, I will be sharing with you I quilted mine.

I had envisioned feathers wrapping inside the leaf so I went ahead and go with it.
Free motion Quilting_Quilt as You go_About a Quilt Sampler QAL Block4

Free motion Quilting_Quilt as You go_About a Quilt Sampler QAL Block4_back

You can practice doodling the quilting with this practice sheet as I did here. If you are still not confident with feathers, you can trace the vines instead as I did in the second block below.

Free motion Quilting_Maple Leaves

I filled the background with swirls and pebbles. Of course you can fill it with whatever filler you wish to do. You can get tons of inspiration and tutorial by Leah Day here.

If you want to practice feathers, I find Carla Barret’s practice sheet very useful. Get use to doodling it with paper on pen first and you will get there. Mine still need practice, but I am pretty happy so far.

Here is how I do my feathers:

Feather Quilting

And here is how I do Swirls and Pebbles.

Swirl and Pebble Quilting as fillers

Well, I hope to see some block made and posted to flickr group!

Till then,
XOXO

Follow on Bloglovin
Hi!
Welcome back to About A Quilt Sampler QAL. If this is your first time here, you can read more on this QAL by clicking here.
If you miss previous post you can always go back to all the post by clicking the button on my blog sidebar or below:
YourSiteTitle
We are already on our fourth block with this QAL. The fourth block of this QAL is the leaf block.
It is a fairly simple nine patch having 4 pieces of half-square triangles , a block for the stem and others are just plain 4.5″ square pieces.
Here is how you should cut your fabrics.

From the solid, cut one 4 1/2″ square, two 2 7/8″ squares and two of 4 7/8″ squares
From the printed green fabric, cut four of 4 1/2″ squares and two of 4 7/8″ squares  

Please note that I use 4 different type of green fabrics, you may stick to one or two. I just love the scrappy look.
For the stem block, take the 2 7/8″ solid piece and align it to one corner of one of the 4 1/2″ green square.
Sew along the diagonal. If you need to mark it first with a ruler and a pen, please be happy to do so. 
Press seam and do the other corner.
As for the Half Square triangle pieces, take the solid piece and the green piece from the 4 7/8″ squares and  piece them together by sewing two lines which are 1/4″ apart from the middle diagonal line. Again, if you need to mark the middle diagonal lines so that you can accurately sew the 1/4″ line on its side, please do so. Cut through this middle line and press the seam to one side or open.
Arrange the patch as so that you will now can piece all of them together row by row into the leaf block
Trim your block to 12.5″ and sandwich it. Will be quilting it soon.
Have fun!
Till next time,
Regards
XOXO
Hi!
We are already on our third block for About A Quilt Sampler QAL.
YourSiteTitle
Today I am sharing how I quilted mine.
Block 3 Quilted
Block 3 Quilted _a
Block 3 Quilted_b
I planned the flow of the free motion roughly on paper. The allover echoed leaves filled the plain triangles and a simple fan filling the four patches. As for the centre four patch, I decided to fill the plain patches with back and forth free motion lines. 
Block 3_quilt test
Again, same with other blocks, I travel from one point to another through the ditch and through the outside of the block. You can see this squiggly travel lines outside the block from the back view. It’s okay, these lines will later be covered when we piece the sashings at the end.

Block 3 Quilted_back
I hope you have fun quilting this block! Feel free to share on flickr too. Till then, see you on the construction of the fourth block!
XOXO
Hi!
I am back here with the third block for About A Quilt Sampler QAL.
YourSiteTitle
Here is the third block as planned:
From the background fabric (here is white) ;  cut 4 pieces 4 3/4″ square & 2 1/2″ x 15″ strip
For all the four patches, you will need 2 1/2″ x 10″ strips from three of the fabric and 2 1/2″ x 5″ strips for one of the fabric which will be the centre four patch.
For the sharp hidden star points, you will need two pieces of each of green and red with the size 2 5/8″ x 5 1/4″.
For the hidden star points, take the 2 5/8″ x 5 1/4″ pieces and stack the four pieces as shown, and cut diagonally. The two pairs have an opposite diagonal cut.
 Fold the 4 3/4″ square background fabric in half and crease the fold just so slightly at the top. 
Cut diagonally from the bottom corner to the mark as shown below:
Now you have the complete cut pieces for the star points.
Piece the points to the background fabric by aligning the point fabric to the equilateral triangle as so that the 1/4″ seam would meet at the diagonal edge
Do the same for the other half  of the point and all of the other 3 blocks
Trim the little block to 4 1/2″ square
As for the four patches, sew the strips right side together on one of the long side. Make sure you pair them with the right one as you want it in the patches.
Cut the strips into 10 pieces of 2 1/2″ strips as shown below
Pieces the 2 1/2″ strips into 5 four patches and arrange them for the 9 patch block. Sew them all in rows and piece the rows to complete your block.
Trim the block to 12.5″ block.
Have fun! I have to say this is my favourite block so far.. 
I hope you like it too. Share on flickr if you made one!
XOXO


Hi,
 
I am getting back on track, and hopefully by April I will be on track and on time with this About A Quilt Sampler QAL post.
 
If you are new here, and want to know more about this QAL and join in, click the button below or the one one my sidebar. It will always bring you to all the post related to this QAL.
 
YourSiteTitle
 
 
Today I am sharing with you ideas on how to quilt your second block.
 
Same as the first block, I would really recommend you to practice doodling your quilting design. You can download a pdf file with the outline of this second block here.
 
I did some practice and tried different designs. It is also helpful to practice your travelling lines using this method, try not to pick up your pen and travel from one point to another via the ditch or the outside of the block.
 
Doodling Quilting
 
For my block, I first make an echo line inside the cards. For all straight lines, I usually mark them with water soluble pen first (using a ruler) as I find it more precise to quilt on this markings. Otherwise, you can go “organic” and a little wonkies won’t hurt I guess.
 
block2quilted
 
block2quiltedfull
 
Here is my block from the backside. This side shows more of the quilting design as it is on a plain fabric. As you can see, I do a lot of travelling on the ditch and outside of the block.
 
Block#2 Quilted back
 
I hope you will have fun quilting yours. Share them on the flickr group. I would love to see your version!
 
Till then
XOXO


Hi!
Sorry for being late. My sewing mojo is definitely taking a break, so I am pretty slow at my sewing machine.
I guess the really busy times and stress at school has taken me over. I am now feeling the pressure of being the 2nd year student…Yikes.
YourSiteTitle
Anyway, today I am sharing with you the instruction for making the second block of the About A Quilt Sampler Quilt Along.  This block is commonly known as the card trick block.
You will need 4 pieces of fabrics for the cards and 1 background fabric
From each of the card fabrics, cut 1 piece of 5 ¼” Square and 1 piece of 4 7/8” Square
From the background fabric, cut 1 piece of 5 ¼” Square and 2 pieces of 4 7/8” Square
From the 5¼” Square pieces, cut them into 4 piece of triangles by slashing through diagonally while from the 4 7/8” Square squares, cut in half diagonally so that you will have 2 pieces of triangle of each fabrics.
 
For the large triangles, match one of each piece of printed triangle to solid background ones and sew along the diagonal edge.
For the smaller triangles, do the same but this time sew on one of thesides of the triangles, making sure that the printed one would be on the right side. 
Position the sewn pieces as below
Now place the leftovers of the large triangles into place as below
Place 4 pieces of the small triangles in the middle part and take note where the seams are to be sewn.
At this stage I normally put the pieces to be sewn right sides together and carefully place them so that I will know which sides to sew.
 
Once all the pieces are sewn into 4 ½” square, sew them row by row. Trim to 12.5” block. And voila! You are done with the 2ndblock!
We will be quilting it soon!That post will be up this weekend.
XOXO

Hi!

Firtsly I am sorry for putting this up a bit late. I was totally wrapped up with moving to a new house and unpacking.

Which;  the whole thing had caused me to lose my block 1, so I piece another one. LOL.

Anyway, I am done quilting it!

Here it is :

quilted block 1 -b

So, for your block, you can try and design how you would want to quilt it. I suggest you to try and do a feature in the plain background.

In mine, I had that squiggly seaweed that I want to pop out.

Scribbling for filling a dense

You can be free and do whatever you fancy. It can be a triangle forming a star feature for the whole block like the one I design in photo below (in blue); or you can add curves (eg the green one) which would definitely give a new look to your block. This is why we call it custom quilting.

QAL quilting
Test design on paper
Test design on paper2

Once you determine the main feature, determine what type of filler quilting design you would like to use.
If you really want to pop out some parts of the quilting design, make sure you use very dense filler design.

I love scribbling as it is very dense and very easy to do and to travel from one place to another.
Here is a great VIDEO TUTORIAL for scribbling by Cindy Needham. Practice the filler quilting on a piece of scrap sandwich (by sandwich, I mean a small scrap of top, batting and backing)

I first outline the outer 1/4inch seam and outline my feature. Then I start quilting the filler surrounding the parts where I want the design to pop out. (in this case I quilt densely around the seaweed)

outline and seam line

Layer your block with the batting and backing. Spray baste if required. Then off to the machine!

First quilt following the outline you drew, then quilt the dense design surrounding the outline.

stitch outline first then dense quilt on one side

I continue to do the corners by adding some swirly. I travel to these corners by quilting in the ditch. Do not worry, it doesn’t have to be really perfect, mine is far out but I am happy with them.

far from perfect

quilted block 1

Back of the block:

As you can see, I also tried to to pop the octopus out.. if you do not have any fussy cut, don’t worry – even better, you can outline a diamond or and kind of shape in the middle and do a dense quilting around it. It will create a great texture and pop the featured shape out!

Back of quilted block

If you are a beginner in free motion quilting, here are some wonderful videos to start with:
and many more inspiration on my pinterest board.
Till then,
I hope you have fun quilting them!
I love to see your work, so if you like, please share them on Flickr group!
XOXO,

Hi!
The first block of this QAL is  this block :
 
From the fabric chosen, cut as per measurement in the photo below:
From the 4 7/8″ square, we are going to make 4 pieces of Half Square Triangle. Put one dark value fabric with background fabric right side facing one another and draw the middle diagonal line.
 
Sew quarter of an inch on each side. And Cut it in half and press towards the darker fabric or press open if preferred.
 
Sew the pieces in three rows of HST and the 4 1/2″ squares together and press seam open or to side as shown. Piece the three rows together. 

Trim to 12.5″ block. You are done!
Have fun making the block!
See you in the next round where we will be quilting it customly!
XOXO,