Previous work in progress post: Together Heart Quilt First Progress
Previous Heart Quilt on the blog


Previous work in progress post: Together Heart Quilt First Progress
Previous Heart Quilt on the blog


There are affiliate links within this post where I may earn a commission from the links. Find full disclosure here.
I think it is so easy to think that in order to start your quilting, we should get straight to do the machine and start right? However, with free-motion quilting, the best way to get started is to do some work away from the machine first. What do I mean by that?

I can’t believe that this one came together pretty quickly. It is surely a quilt in a day. I guess it is not a quilt yet, just a quilt top flimsy at the moment. But it came together in a few hours. So, technically if I did have the time to spend a couple more hours, it can become a fully finish quilt – in a day.
This pattern makes a perfect baby quilt. and the pattern is free….

Previous Heart Quilt on the blog
This quilt in progress is a new start late last year. When I first saw the pattern, I knew straight away that I wanted to make it. Something about the alternate blocks and the varieties of the heart quilt blocks that makes me want to jump right in and start piecing.
I also love the idea of making a few of the same quilt blocks on repeat. I find myself getting bored of making too many of the same quilt blocks, so patterns like this are always something that interests me.
Using fabrics from my stash of pinks and corals, I started making the blocks for the quilt.
The pinks and corals of this quilt are making heart fleet around as I make these heart quilt blocks.
I love it when I get to mix and match what I have in stash in a quilt.


These strip pieced ones took a little longer to piece, but they are fabulous. The more patches the better right?

And then there are the alternating blocks.

I am using these mushroom fabrics for the four patches, they’re super cute and have been in my stash for quite a while. I thought it would be nice to finally use them since I have the required amount just for the job.
The only thing about using this mushroom fabric is that it is directional, so I have to make sure that the mushrooms are all upright.
Well, will anyone notice? But I try to anyway cause it’s fun.
Stripology Ruler helps make strip piecing a breeze. I highly recommend this ruler. A little pricey for the large one, but so easy to use. And I can’t tell you how often I am so glad I have this ruler and how it has help in making tons of scrips in matter of minutes and without the hassle of moving the rulers and the fabrics for each cut.
View this post on Instagram
I am hoping to finish off the alternating blocks in the next few weeks as I sew a couple of minutes a day. Yes, lately I have not had much of a sewing time but a little progress can go a long way!
Even the above video is not even done in one day. Can you believe it?
I sometimes only have time to do one step of the process. Sometimes I get to press a couple of strips. Sometimes to sew a couple of seams. It all adds up. Trust me. This is why I love patchwork!
If you have been struggling to find time to sew, maybe you’re aiming to sew for a whole block of time of an hour. Ideally, that would be awesome.. but sometimes, a few minutes can also do wonders!
Till next time,
Let me know in the comment, do you like heart quilt blocks too?
Happy quilting!
If you have been in the quilting world for a while, you probably have a list of quilts you’d like to make someday. I call this my Quilt Bucket List
Well, in this post, I thought it’d be fun to share with you my bucket list of quilts I’d like to make someday.
And taking the spirit of the new year, I am probably going to start most of these this year too!
This list is definitely going to grow or maybe change, but for now, this is what I have:
This is high on my quilt-to-make list.
In fact, I actually started this some years ago. But, I think I’ll start over, just because I feel like my skill has definitely improved since then. I can do better and would like to tackle this again.
I am a sucker for sampler quilts, but this is a 4” block sampler! And because it is so tiny and fine is what makes it beautiful and tempting.
The triangle scalloped border is also an interesting feature of this quilt.
Definitely a lot of challenge, but also a lot of potential for learning and improving my quilting skill.
I have seen a lot of different versions and colorways for Dear Jane Quilt, and I think I have not yet found one that I don’t like.
You can simply search on Google or Pinterest for Dear Jane Quilt and you’ll be amazed at all the different versions of this dear quilt.
ecing
I love the idea of making a rainbow version. And that was the one I started. So, maybe I will continue with the rainbow version starting again.
The book has no direction for the block, just a picture and the outline of the block. However, there are Electric Quilt 8 add-on to help with the piecing or to paper piece the blocks.
There’s also a blog that helps with tips and some guidance.
All of these are linked down below:
Have you ever thought about making this quilt too?
Let me know in the comment if you are!
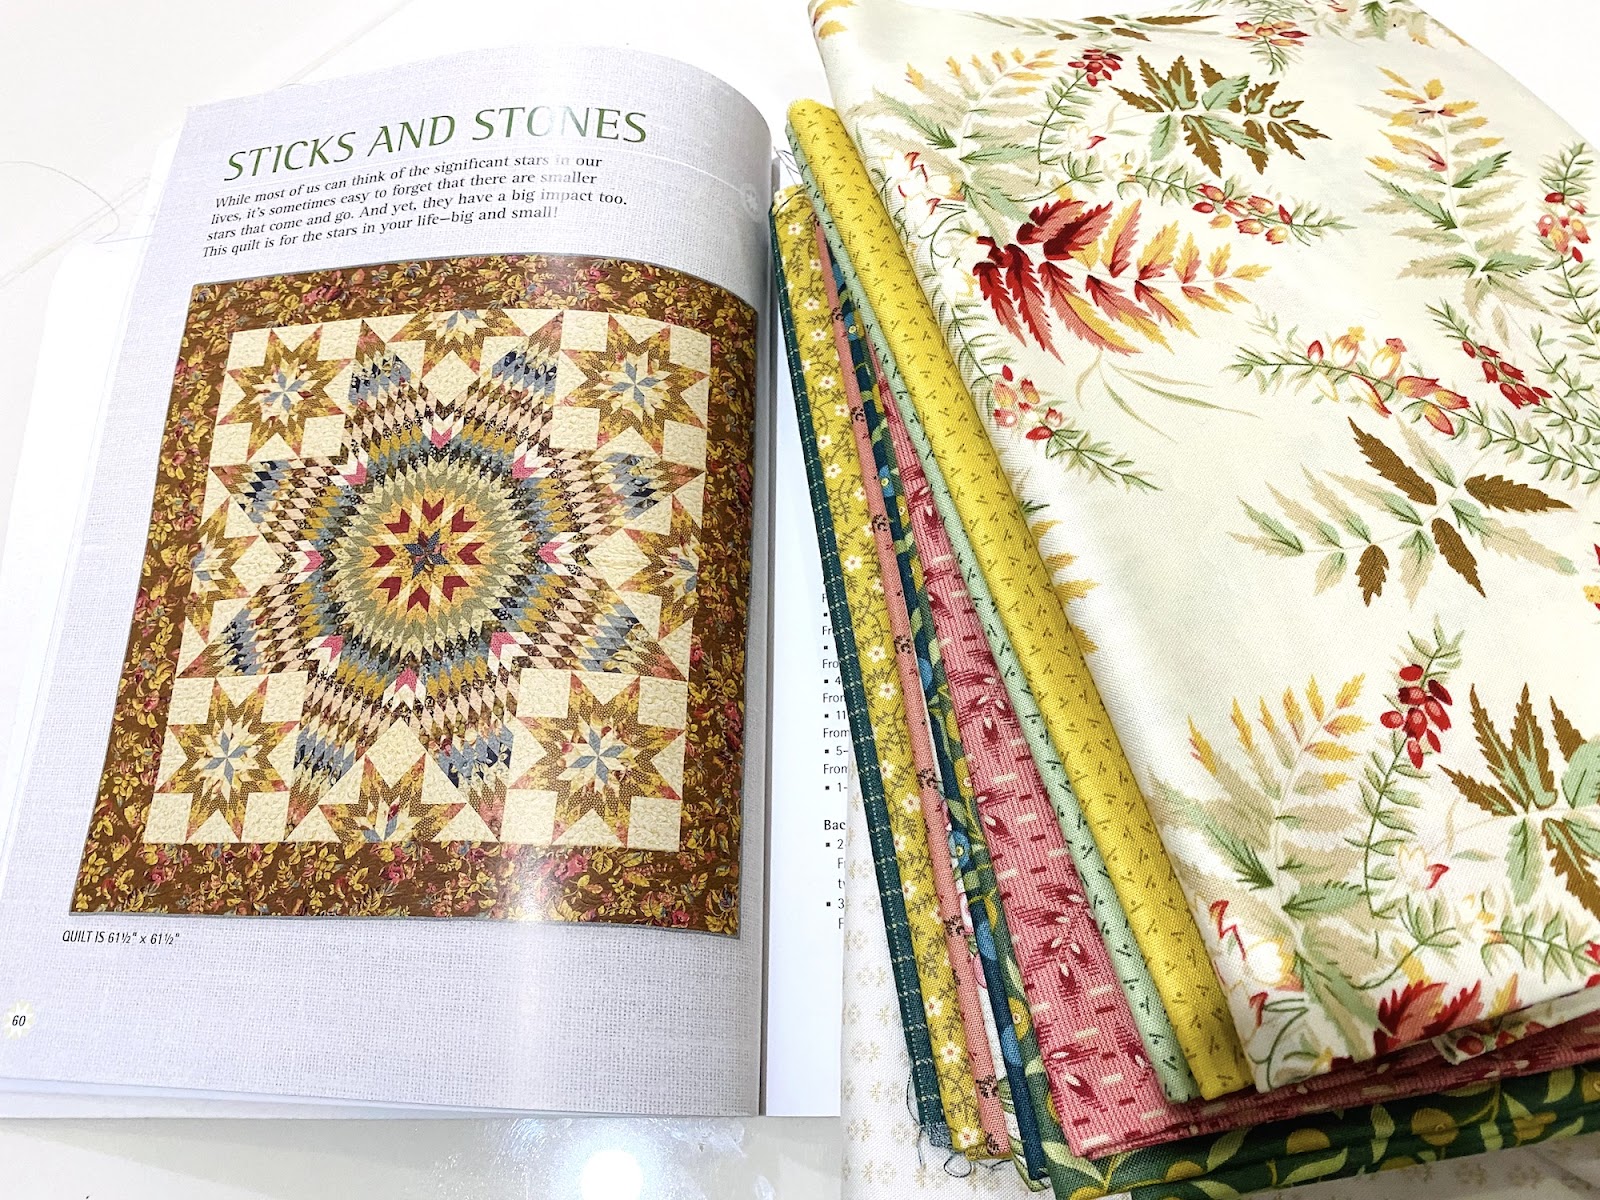
I have always been fascinated with antique quilts, and one of the popular designs that I often come across is the lone star quilt. There are so many version of this, but I particularly love the big single one made of little diamonds.
I have been putting this on my bucket list for a while but has never really tried it at all. I can see that strip piecing would be the way to go for this.
This kit is a version of lone star quilts, a great way to just get to it straight away! I love the way the colourway changed in this one.
I am planning to make one this year, or at least start one from Edyta’s Patches of Star book.
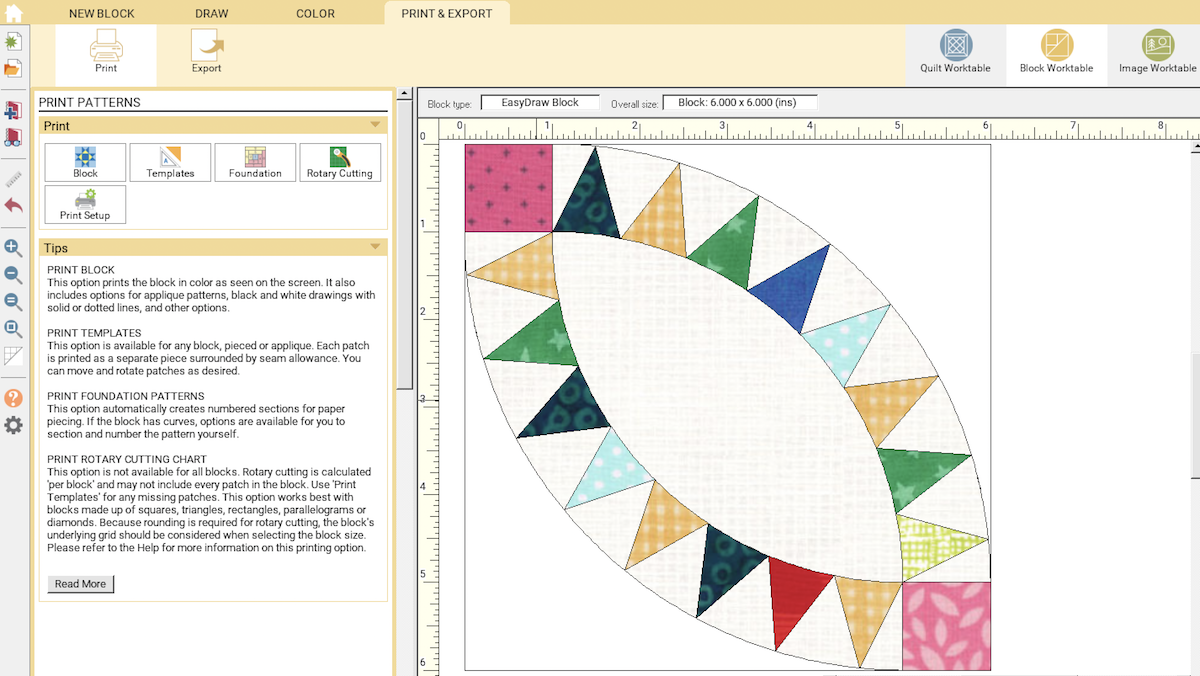
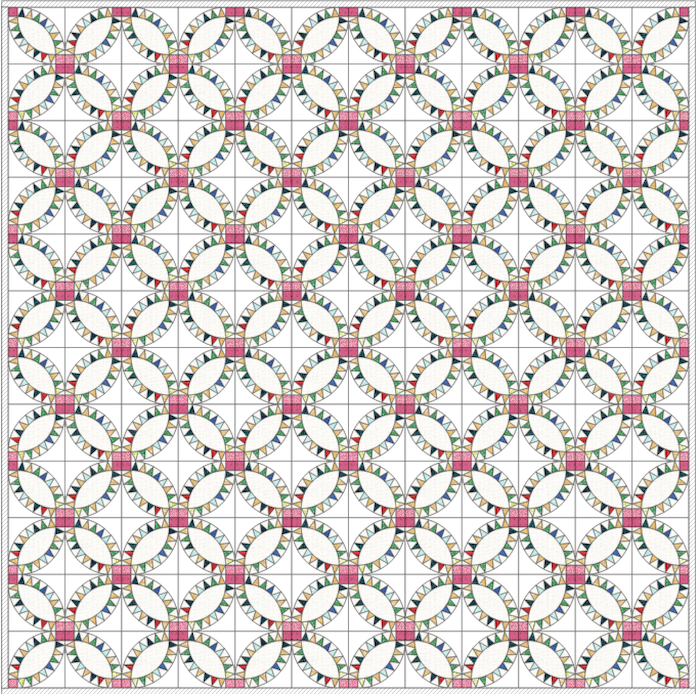
Pickledish quilt seems to be very similar to the wedding ring quilt. The wedding ring quiilt used to be on my bucket list too, until I got it done. I still make another one though. I just recently bought the die for the wedding ring quilt, so that is definitely coming again.
Anyway, the pickledish quilt is pretty similar, but I guess the arch is slightly different in terms of the width and the pieces that make up the arch.
I love the version with the spiky look in the arch. In the EQ8, I can use the block Prickly Prickle and start this one right away.
Here is my draft in EQ8
You can see an example of a finished quilt of the prickle pickledish similar to this by Jo Avery here.
Pickledish quilt with thinner blades like the one on the cover of this book is also interesting and maybe someday I will get to make that one too.
This is probably a long term project. And I may not start this just yet. Just because I haven’t yet made an applique quilt. It seems intimidating, but for surely someday I would like to attempt this.
It is just stunning.
And I particularly love the idea of alternating star blocks of this pattern too.
Stars and Sprigs by Kim McClean – You can get the pattern here.
Other quilts that are on my quilt-to-make bucket list are already in progress. I just hope to finish them someday! These include:
This one is taking its sweet time, but I am loving the progress so far. I am looking forward to working more on this project this year.
You can see some of the progress of this quilt here, here and here.
This one is really interesting as I love the way the blocks are overlapping over with their neighbors. Curve piecing is also something I would like to challenge myself with.
I also love the dual-color versions of this quilt.
Like this red winding ways quilt by Joyce or this blue winding ways quilt by Bethany Quilt
-I am already cutting these using Accuquilt with this die, I absolutely love using Accuquilt to cut curve templates. Makes it super fast and I can just focus on the piecing process.
Well, I guess that is it for now! I am sure that this list is going to grow as I find more beautiful quilts I want to make.

Another baby clothes memory quilt is done, this time for a girl. I don’t usually take commission quilts, but sometimes I do, just to challenge myself and hopefully to help others cherish their kid’s baby phase memory.
Read also: Baby Clothes Memory Quilt (Boy)
It took a while as I worked on several projects at a time. This was not my usual colour palette too, and it was a little challenging when working with something that is a little different than what I usually prefer to.

This is another post for the update on my Sewcialites Quilt. This is a FREE quilt along that has just ended but you are free to download the patterns even though the QAL has ended.
(The QAL began on Friday, September 25, 2020 and ended on Friday, July 2, 2021)
You can check out some of my previous posts on the blocks and some of the tips and things I learned as I made the blocks and the quilt top.
In this post, I have a finish quilt to share with you!

My favourite about Fat Quarter Shop is their excellent customer service and flat rate International shipping for order over $100..
What I’ve been eyeing on:


Update on September and October quilting updates.
Another month has passed. Last month I didn’t get to do this, so there’s a lot to share with you this time around.
I hope you’ll enjoy it and find some inspiration from some of the projects I share here. I love listening to other quilters talk about their projects and progress while sewing.
So, come and visit me in my sewing room, have a chat while you work on your project.
You can watch the video below, come and visit me on the channel to follow me there too!
All the links to the things mentioned in the video are below.
~Art Gallery fabrics solid pure elements
~ Free Jelly Roll Quilt Pattern : Jelly Roll Spinner
~blog post of Good Times Quilt
~Fabric Baby It’s Cold Outside
~Kinship 100 days 100 blocks: use coupon AMIRA for 10% off pattern
~Hands On Design Cross Stitch Let’s Talk Stitching
Some of these are affiliate links in which I may earn a small commission. However, all the links are all listed here to make it easy for me to share them with you.

While I love making large bed quilts, it does take a long time to finish one. This is when I love the easy quick quilt.
And sometimes, I just need the kick of having some finishes to keep me going with those large bed quilts.
So lately, I have been trying to make a couple of smaller quilts. Something to keep the creative juice going and keep me motivated while simply just having fun in the sewing space.